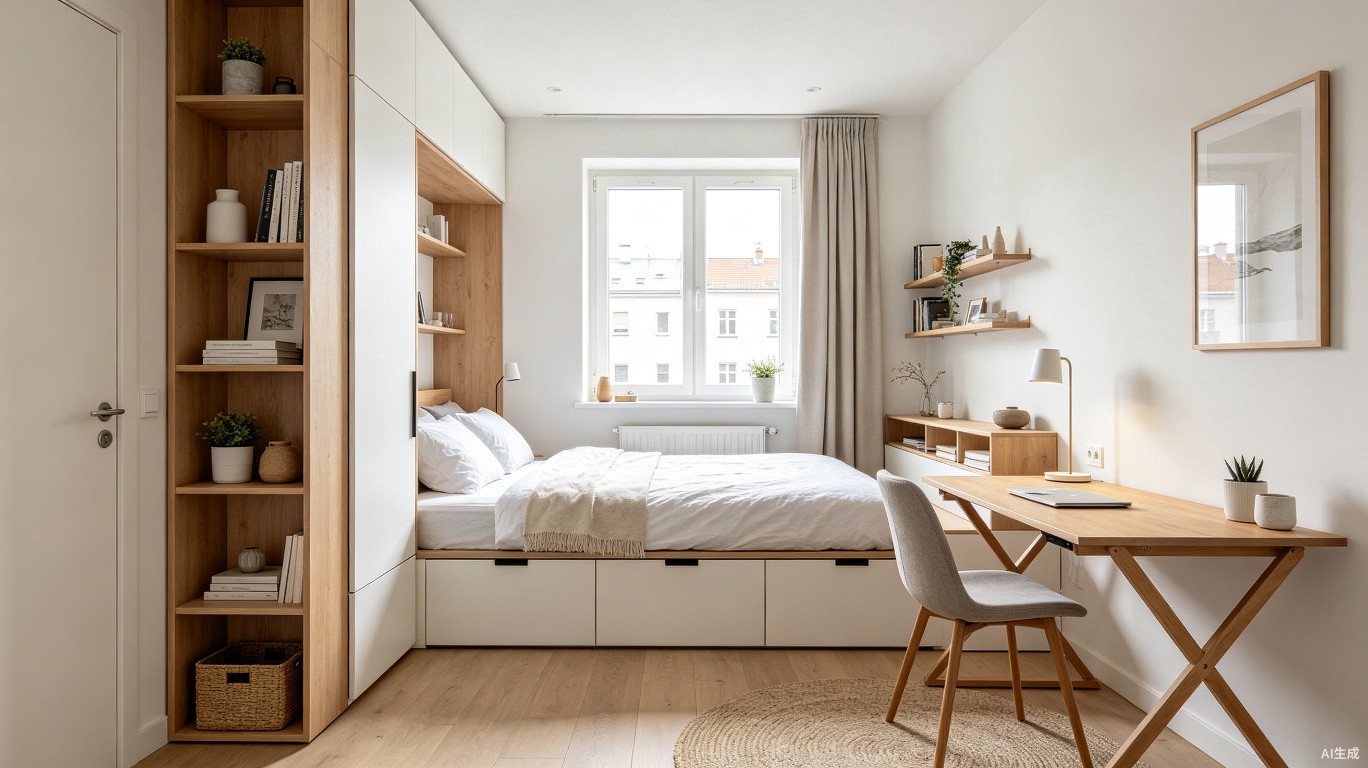

Living in a studio apartment is an exercise in creative problem-solving. Within a single room —often between 300 and 500 square feet —you must accommodate sleeping, lounging, dining, working, and entertaining without any one function overwhelming the others. The difference between a studio that feels like a well-designed home and one that feels like a dorm room comes down to layout strategy. We have analyzed dozens of successful studio layouts to extract the principles that make them work, and here they are, organized into fifteen actionable tips.
Zoning and Space Definition
1. Define zones with furniture placement rather than walls. A studio apartment needs at least three distinct zones —sleeping, living, and dining/working. The most effective method for defining these zones without visual barriers is to orient furniture to create implied boundaries. A sofa with its back to the bed creates a psychological wall between the living and sleeping areas, while an area rug under the living zone anchors that space visually. Each zone should feel like a distinct destination rather than furniture pushed aimlessly against walls.
2. Open shelving units placed perpendicular to walls serve as room dividers that provide storage and maintain sightlines. A Kallax-style unit from IKEA, measuring roughly 58 by 58 inches with 4-by-4 cubbies, can separate the bedroom from the living area while allowing light to pass through. Leave some cubbies open for display and fill others with baskets or bins for concealed storage. The unit should be anchored to both the floor and ceiling for stability, especially in earthquake-prone regions. For a lighter visual presence, choose a unit with a white or light wood finish rather than dark colors that absorb light.
3. Curtains on a ceiling-mounted track create a soft, flexible partition between sleeping and living areas. Unlike a permanent wall, curtains can be opened to make the apartment feel expansive during the day and closed at night for privacy and a cocoon-like sleeping environment. Heavy velvet or blackout curtains provide complete visual and light separation, while sheer linen curtains create a more delicate boundary. The track should extend at least 6 inches beyond the bed on each side so the curtains stack fully on the wall when open. Ceiling-mounted tracks from IKEA cost $20 to $50 and are DIY-installable with basic tools.
Furniture Selection and Placement
4. Furniture that serves multiple functions is not optional in a studio —it is essential. A storage ottoman works as a coffee table, extra seating, and a place to stash blankets and board games. A drop-leaf dining table folds to a slim console against the wall and expands to seat four when guests arrive. A daybed with a trundle provides a sofa by day and sleeps two by night. Before buying any piece of furniture for your studio, ask whether it performs at least two functions. If it only does one thing, find a multi-functional alternative or question whether you need it at all.
5. Murphy beds and wall beds have undergone a design revolution and are no longer the clunky, institutional fixtures of decades past. Modern Murphy beds from brands like Resource Furniture and Clei incorporate sofas, desks, or shelving on the front panel, so the bed disappears completely when folded up. A queen-size Murphy bed with an integrated sofa costs $3,000 to $6,000 installed —a significant investment, but one that effectively doubles the usable floor area of the apartment during waking hours. For a more budget-friendly option, a cabinet bed that folds into a credenza when not in use costs $1,200 to $2,500 and requires no wall anchoring.
6. Choose furniture with legs rather than pieces that sit directly on the floor. Legs create visible floor space underneath, which tricks the eye into perceiving more open area. A sofa with 6- to 8-inch tapered legs, a bed frame on 8-inch legs, and nightstands with slender legs all contribute to this effect. Avoid skirted sofas and platform beds with solid bases —they create visual heaviness and make it impossible to store items underneath. The additional clearance under raised furniture also makes vacuuming and cleaning easier, which is not a small consideration in a small space.
Visual and Optical Strategies
7. A consistent light wall color throughout the apartment creates visual continuity that makes the space feel larger. Warm whites like Benjamin Moore White Dove or Sherwin-Williams Alabaster reflect light without feeling cold or clinical, and they provide a neutral backdrop that ties together diverse furniture styles. Painting the ceiling the same color as the walls —rather than the traditional bright white —blurs the transition between wall and ceiling and makes the ceiling feel higher. For added depth, paint the trim and doors a shade or two lighter than the walls in the same color family.
8. Mirrors are the most cost-effective tool for visually doubling a studio. A full-length mirror leaning against the wall opposite a window reflects natural light deep into the room. An oversized mirror —at least 36 by 60 inches —mounted on the wall perpendicular to the windows creates the illusion of another window. For maximum impact, position mirrors to reflect an attractive view: a window, a plant, or a piece of art. Avoid placing a mirror directly across from the bed, which can feel unsettling. Mirrors also reflect lamps and ceiling lights at night, amplifying the apartment's lighting without adding fixtures.
9. Vertical stripes and vertical lines in wallpaper, curtains, and shelving draw the eye upward and create the perception of height. Floor-to-ceiling curtains in a subtle vertical stripe, a floor-to-ceiling bookcase with closely spaced shelves, or even vertical shiplap on one accent wall can add a perceived 12 to 18 inches of ceiling height. The key is to ensure the vertical lines are uninterrupted —curtains should run from ceiling to floor, and shelving should extend from baseboard to ceiling. The moment a vertical line breaks, the eye stops and the illusion collapses.
Storage and Organization
10. Vertical storage that reaches the ceiling exploits the most underused dimension in every studio apartment. A wall of floor-to-ceiling storage —closets, shelving, or a combination —along one wall consolidates all the apartment's storage needs into a single architectural element. IKEA PAX wardrobes, at 93 inches tall, can be extended to the ceiling with filler panels painted to match. The top shelves, accessible with a folding step stool, store out-of-season clothing and rarely used items. Consolidating storage onto one wall frees the remaining three walls for windows, art, and lighter furniture arrangements.
11. Under-bed storage should be treated as primary storage, not an overflow bin. Use shallow, clear bins with tight-fitting lids —the clear material means you can see contents without pulling everything out, and the lids protect items from dust. Group items by category: one bin for out-of-season shoes, another for winter accessories, a third for spare bedding. Label each bin on the side facing out so you can identify contents from a standing position. If your bed frame is too low, inexpensive bed risers add 3 to 6 inches of clearance and cost $15 to $30 for a set of four.
12. Furniture with built-in storage reduces the need for additional storage pieces that consume floor space. A storage headboard with shelves and compartments eliminates the need for a nightstand. A coffee table with a lift-top mechanism provides a work surface and hides living room clutter. A dining bench with a hinged seat stores table linens, board games, or seasonal decor. These dual-purpose pieces cost 20 to 40 percent more than their single-function equivalents but earn back their cost in recovered square footage within the first year.
Layout and Flow Optimization
13. Create a clear circulation path that connects the entry, kitchen, bathroom, and primary living zone without cutting through the sleeping area. In a rectangular studio, this typically means placing the bed at the far end of the room, farthest from the entry door, with the living zone in the middle and the dining/work zone closest to the kitchen. The circulation path should be at least 30 inches wide —the minimum for comfortable passage —and should not require stepping over or around furniture. Walk the path yourself after arranging furniture and adjust if any point feels cramped.
14. Float furniture away from walls rather than pushing everything to the perimeter. Pushing all furniture against the walls is a natural instinct in small spaces, but it creates a vast, empty center that feels awkward and makes the room look like a waiting area. Floating the sofa in the middle of the room, with a console table behind it, defines the living zone and creates a second circulation path behind the sofa. The back of the sofa should be at least 30 inches from the wall or the edge of the adjacent zone. This arrangement requires courage but consistently produces the most sophisticated studio layouts.
15. Use lighting to reinforce zones and transition between them. Each functional zone should have its own lighting —a pendant or chandelier over the dining table, a floor lamp next to the sofa, wall-mounted sconces on either side of the bed, and task lighting at the desk. When all lights are on, the zones are unified; when only one zone's lights are on, the others recede visually. Dimmer switches on all ceiling fixtures allow you to shift the mood of the entire apartment from bright and energetic during the day to calm and intimate in the evening. Smart bulbs, at $15 to $40 each, offer app-controlled dimming and color temperature adjustment without rewiring.